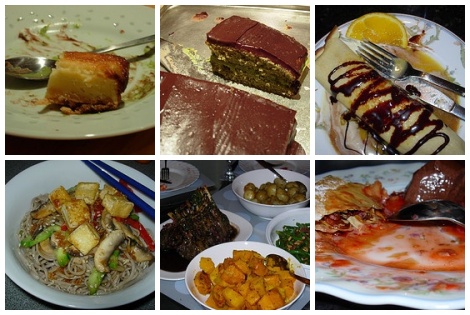
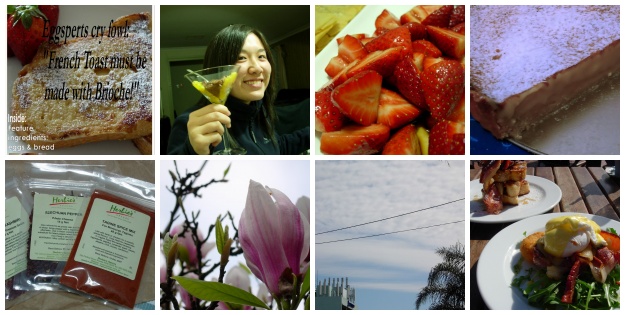
Pages

Wednesday, January 31, 2007

BPW - Valentine's Postcard

Postcard for BPW

Stamped and popped into the big red box on Monday, 29.01.2007 as per Meeta's instructions. :)

Would you believe that there is no such thing as a Valentine's postcard in this city? I have searched high and low, into every supermarket, newsagent, specialty card store and every post office in the vicinity of work (and home) for a Valentine's related postcard and every time I asked someone they look at me like I was from Mars.

Oh bugger it, might as well make me one.

Ingredients:

A piece of white card, some pink coloured paper, some photo paper and half a piece of self laminating paper and with the help of some leftover decorations (heart shaped confetti, roses and ribbons) from the Hen's veil that I made for my friend last year... ta dah.. a home-made Valentine's postcard.

I hope it arrives in ONE PIECE to a mystery BPW blogger somewhere out there :)

Oh.. and the cookies on the photo? Gingerbread cookies w/ chocolate ganache. Wonder where they are now.. *twiddle*

Saturday, January 27, 2007

HHDD#9 - Souffles and the sinkerphobia

I have a confession to make. I am totally terrified of making souffles. There are three thoughts that crosses my head every time I come across a recipe for souffle:

1. Wow... that looks delicious!
2. The recipe doesn't look too hard..
and then... Lucy Liu's sinking souffle scene from Charlie's Angels enters my mind and I flip to the next page and tell myself.. maybe next time..

I call it.. "the sinkerphobia"..

Ok, so it sounds a bit dramatic, but it's true! That scene haunts me and is replayed in my head every time someone mentions "souffle" or if I even see the word "souffle".

Well that particular scene shall haunt me no more! Today I faced me fears and conquered the sinkerphobia! It only took me two weeks since Tami threw down the gauntlet and challenged invited everyone to a souffle fiesta.

It has literally taken me two weeks, I found a recipe for souffle that was easy enough to make and studied it almost every day.. trying to work up the courage. Then I went out, purchased some ramekins and stared at the ramekins for a few days, working up some courage and finally tonight (on the last day of entry) did I manage to convince myself that I should put my fears aside and give it a go. (Oh, I should mention that I did get some encouragement from the Boy)

souffle round 2


Vanilla souffle with chocolate sauce
*from For Chocolate Lovers by The Tanner Brothers

Souffle:
475ml milk
125g caster sugar, plus extra for coating
1 vanilla pod, split and seeds scraped out
6 eggs, separated
60g plain flour
softened butter, for greasing

Gently warm milk, half of the sugar, vanilla pod and seeds in a saucepan (do not boil). Remove from heat and leave to infuse for approx 15mins.

Whisk together egg yolks, flour and remaining sugar in a separate bowl until the mixture forms a smooth paste.

Pour in the milk and mix well. Transfer milk and egg yolk mixture into a clean saucepan and heat gently for 10 - 15mins, stirring until mixture begins to thicken. Remove from heat, transfer onto a large clean bowl and cover with cling film. Leave to cool.

Preheat oven to 200 deg C. Brush the insides of 6 large ramekins with butter and coat the insides with sugar by placing 1 tbsp of sugar into the ramekin and rotating until the insides are completely coated. Pour excess sugar into the next ramekin and repeat. Chill coated ramekins in the fridge.

Whisk egg whites until stiff peaks form. Add half of the egg whites into the custard and mix well. Fold in remainder of egg whites.

Spoon souffle mixture into ramekins, filling them up to the top. Carefully tap down the dishes to release any trapped air in the ramekins. Place on a baking tray and bake for 10 - 15mins.

Important Note: Do not open the oven during baking as this will allow hot air to escape and may potential create the sinker phenomenon.

Chocolate sauce:


Ingredients:
350ml whipping cream
150g bittersweet chocolate, broken to pieces
cocoa powder for dusting

Gently heat the cream to point of just boiling. Remove from heat and pour into chocolate and stir until melted. Set aside.

When souffles are ready, carefully remove from oven, dust with cocoa powder and serve with chocolate sauce.

*Serves 6.

Vanilla souffle w/ chocolate sauce

The verdict:

As there was only the two of us, I decided to halve the recipe and served it with some leftover blackberry compote. Taste wise, it wasn't too sweet and the chocolate sauce more than made up for the lack of sugar. The Boy on the other hand, gave it two spoonful and announced that he didn't like it, he said it was like eating scrambled eggs. Hmmph.. after all that effort..oh well.. more for me.

souffle

However, I'm extremely proud to announce that I passed the test! (The boy who was watching throughout my ordeal, reckoned that I was starring at the oven and the souffle all through the baking time) My souffles did not sink! They all rised and one of them kinda exploded because I overfilled it. Hahah.. so I guess I was a bit silly for worrying so much about it.

The sinkerphobia has been conquered! Thanks to Tami and her choice of theme for the first Hay Hay it's Donna Day (HHDD) of 2007. Don't forget to stop by Tami's for the round up.

The Hay Hay it's Donna Day event is the brainchild of Barbara of Winos and Foodie.


emptyramekins

Sunday, January 21, 2007

Waiter, there's something in my ... stew

When Andrew of SpittoonExtra announced the first theme for Waiter, there's something in my.. as 'stew' my first reaction was "nooo....that's winter food!" Of course, it would only make sense for Andrew to pick stew as a theme, it is winter in the other side of the world at the moment, not everyone one is as ungrateful as I am about summer down under.

For the record, I am not ungrateful that we are experiencing the beautiful summer weather. I did grow up in Malaysia, where it's hot and humid all year round except in the monsoon seasons, when it's hot, humid and raining! Give me hot weather any day vs cold winter days. It's just that.. it's.. very.. hard... to bring yourself to cook something like a hot stew (cold stew just don't do it for me) when it's scorching 30s every day...

Still, I am living in the city of four seasons, so I didn't give up hope that my city would bring me at least one miserable change of weather in the 15 days leading up to the entry deadline... and mates.. the City of Melbourne, ALWAYS delivers! I may sound like I'm exaggerating but ask any Melbournian/Melburnian (whichever is your fancy) and they'll tell you that the weather in our beautiful city is extremely unpredictable, even in summer.

And YES! I got my change of weather in the weekend of 13/14 Jan. It was a sunny but chilly weekend for summer but I could not ask for a better weekend :)


Nikujaga

Nikujaga, literally meat and potatoes is the japanese version of a meat stew. According to Obachan, it's one of the dishes that all the young ladies in Japan are graded on as a measure of what sort of housewife one would make. The other dish is miso soup. (Phew, glad I'm not Japanese, I've only made stew once and that was by throwing everything into a pressure cooker!)

The recipe I chose to make from one of my favourite books, Yoshoku by Jane Lawson. I remember pouring through the book when I first bought it, bookmarking every single thing in sight that I was interested in trying. But you know how it goes with a new book, it always sits at the top of the pile (of books you were previously really keen on). You're always eager to try new recipes so the new book's would have all these post-it tags marking the pages and recipes to try...and then when the next new book comes along, a new favourite sits on top of the pile and the old favourite is soon forgotten. Those recipes that you had eagerly bookmarked never reached the kitchen for trial.

This was one of those forgotten recipes. I remembered that the only reason I bookmarked it was because the ingredients listed japanese beer and sake as two of the key ingredients for the stew. ;)

The original recipe was for lamb shank and potatoes. I'm not a big fan of lamb shanks, so I've substituted the lamb shanks with beef and added some carrots to the dish.

Nikujaga
*adapted from lamb shank and potato stew in Yoshoku by Jane Lawson

700g all purpose potatoes*
2 tbsp vegetable oil
1 large onion, cut into thin wedges
1.5kg lamb shanks (approx 6 large lamb shanks)**
ground white pepper
1tsp sesame oil
2 tsp dashi granules
125ml Japanese beer (I used Kirin)
60ml Japanese soy sauce
125ml sake
2tbsp dark brown sugar
60g drained, sliced bamboo shoots
1litre of water

*I substituted 1/2 of the potatoes with carrots
*I substituted the lamb shanks with about 1kg of chopped scotch fillets because there weren't any chucks available.

Chop up potatoes into 3/4cm chunks and soak in cold water for 30mins. Drain potatoes after soaking and pat dry with paper towels.

Heat 2 tsp of vege oil in a dutch oven or a large saucepan over medium-high heat and cook onions until lightly browned. Remove and set aside. Add another 2 tsp of oil and fry the potatoes until lightly golden. Remove potatoes from heat and set aside.

Lightly season beef (or lamb) with salt and pepper. Add remaining oil into the pan and brown the beef on all sides.

Return onions to pan along with dashi granules, beer, soy sauce, sake, sugar and water and stir to combine. Increase heat and bring to boil, skim off any foam that rises to the surface. Cover and reduce to a simmer and cook for 1 + 1/4 hours.

After 1 + 1/4 hrs, add the potatoes and bamboo shoots and cook uncovered for a further 45mins or until potato and beef are very tender but not falling apart. Continue to skim off any foam from the stew. (I added my carrots when the timer had 30mins left)

Serve in bowls with a little of the broth in Japanese style with a bowl of rice and miso soup or with some hot bread rolls.

For a richer dish:

Remove the meat and potato (and carrots) from the pan, cover and set aside. Increase the heat to high and boil the remaining liquid for 20 - 25mins until it is slightly reduced. Return the meat and potatoes to the pan and coat in the sauce and let it heat through.


The verdict:

I actually prefer the less richer version of the stew. I tasted the stew at the first cooking point and thought that it was ok but could do with a bit more flavour. So I let it cook further and then found that it was a bit too rich for my taste.

I found that I could only taste a hint of the beer every now and then, the stew liquid was too sweet and salty because of the combination of brown sugar and soy sauce. The beef was very tender and the potatoes was probably a bit over cooked. The part I love most is the bamboo shoots, it adds a bit of crunchy texture to the stew.

The best part about this stew was that I managed to convince a non-stew eater to eat it! Alv doesn't like stews, he calls them try hard curries... because there's potatoes and onions in it, the meat's cooked til tender but the sauce is not spicy like curries. He changed his mind though after having it for dinner the next day. He said that he didn't mind it though he reckoned that I should tone down with the beer (I don't think so..). And.. he actually said that he wouldn't mind having it again.... SCORE one for Me!!!


Notes:
Jane recommends beveling the edges of the potatoes with a sharp knife or vegetable peeler so that it's slightly rounded. This will soften the shape of the potatoes and prevent them from breaking up too much during cooking

If you prefer a less sweet sauce, reduce the amount of brown sugar to 1tbsp.

For a less salty sauce, try using light soy sauce.

Left over sauce from the stew


Waiter, there's something in my... is the new 2007 blog event created by Andrew of SpittoonExtra, Jeanne of Cooksister and Johanna of The Passionate Cook.

Saturday, January 20, 2007

SHF 27 - Koko Black and Choko Maki

The first Sugar High Friday for the year is being held over at David Lebovitz. Being a chocolate man himself, it's little suprise that the theme for the month was to be chocolate related. This time, David invited bloggers to whip up a chocolatey treat and blog about the brand of chocolate that was used to make the treat.

A block of Koko Black 60% Dark chocolate

My choice of chocolate is the 60% dark chocolate from famous Melbourne chocolate salon, Koko Black. The Koko Black store first opened up in Melbourne at the end of 2003. It was one of the first few chocolate stores that not only sold the fruits of their labour, but also served them on location. Koko Black's also unique in that the chocolates are made on location at their flagship store in Melbourne's Royal Arcade (off Bourke Street) where a display window often wows the passerby/s and more often than not manage to persuade one or two to venture in and indulge on some of their offerings(pdf).

I have only been to Koko Black twice since 2003. Mainly because back then their only store was located in the Melbourne CBD and unfortunately I work and live out in the suburbs and rarely ventured out to the city. Since then they've opened up 3 other stores, 2 in suburbs closer to me.. whoppeee!

So why did I chose to use Koko Black? Well, to be honest, I've never really made anything with their chocolate before. I've made chocolate fondues with Max Brenner chocolates and some Callebaut chocolate that I got from my boss Kathy; and I've even made a chocolate tart for Christmas using Felchlin, but I've never tried cooking/baking with KB chocolates. Since David is interested in the brand chocolate, I thought that it would be a great chance to actually make something with KB chocolates, instead of taking the easy way out by paying a visit to one of their salons for a treat. LOL

Azuki, Banana and Chocolate Roll

Having made chocolate biscottis, chocolate truffles and a chocolate tart last month for christmas, I was a bit choco'd-out and couldn't decide what to use my precious KB chocolate for. So I turned to my favourite cookbook, Yoshoku for some inspiration and found this interesting little treat. Jane Lawson (author) calls it Azuki bean, Banana and Chocolate Spring Rolls, I call it choko maki or chocolate roll for short.

It's a very quick, simple and easy to make recipe and only requires 5 ingredients and oil for deep frying.

Azuki bean, Banana and Chocolate Spring Rolls
*from Yoshoku, by Jane Lawson

6 Spring roll wrappers (Medium or Large sized)
1/2 cup Azuki (red bean) paste
3 small Bananas, sliced
85g Good Quality Dark chocolate, cut into fingers (I used the whole 100g block)
1 egg, lightly beaten
vegetable oil for frying

Layer azuki paste, banana and chocolate (on top of each other) on the spring roll wrapper, roll it up like you would a normal spring roll and seal by brushing a little of the beaten egg on the last flap. Repeat with remaining ingredients.

When the rolling process is complete, refrigerate the rolls and heat the oil for frying.

Heat oil in a deep-fryer or large saucepan to 180 deg C. Cook spring rolls for 3 minutes or until golden brown. Remove and drain the excess oil on paper towels. Cool slightly before serving with a scoop of ice cream (matcha or vanilla) or by itself.

Serves 6.

Notes:
The amount of wrappers, bananas and chocolate you need generally depends on how many you're making.

Always place a tea towel on top of the unused spring roll wrapper when not in use as this will prevent the wrappers from drying up.


Azuki, Banana and Chocolate Roll

The verdict:

There's just something about banana and chocolate together that just works wonders. As you would imagine, the chocolate melted in the deep frying stage and when I sliced the spring roll in half (for the photo) the chocolate threatened to complete ooze out of the spring roll. You can't see it in the photo, but the chocolate from other half that was being propped on oozed out.. LOL.

At first, I was a little bit worried that the azuki paste would be too sweet and would overwhelm the roll with its sweetness. Boy was I wrong, if anything it was the chocolate that overwhelmed the azukis. The azuki taste was pale in comparison to the chocolate and banana. I'm not sure if it would've made a difference at all if it was present in the ingredients in the first place. But that said, after a few bites into the roll, I didn't mind them too much, although I would probably put more banana slices next time.

My two lab rats friends Steve and TH, both loved it, Alv took a little bit of convincing as he wasn't sure about 'sweet' spring rolls as oppose to your usual savoury ones. But once he took he bite he was well and truly convinced. (it does help that we're all suckers for deep fried things!)

A bit of warning though, be prepared to get your fingers dirty and you will need a bit of acrobatics when eating the rolls as the chocolate just oozes and oozes and oozes... "argh.. watch it, don't let it drip.. noo...you're wasting the chocolate..." ;)

Tuesday, January 09, 2007

Christmas Celebrations - Part 2

Christmas 2006 was one to remember! We had been experiencing the usual hot summer weather leading up to christmas and lo and behold.. in typical Melbourne fashion the temperature dropped down to the 'teens on Christmas day and the change of weather came with patches of rain.

I suppose I shouldn't complain since everyone in the Northern Hemispheres are going through their winter season at the moment.

Anyway, we were fortunate enough to be able to join Deb's (Alv's sister in law) family for christmas this year (I still can't get over the fact that we're in 2007!) at their place. If it wasn't for that, we'd probably be staying home having instant noodles and water for christmas lunch. LOL.

Don't get me wrong, we had already planned on having Christmas dinner with a few friends who have also been left to fend for themselves this christmas. But christmas is a family celebration and it would have been a pity if it wasn't celebrated with family of some sort at all.. especially on the actual day.

My family is very traditionally chinese, in the sense that we don't celebrate christmas but my mum does observe the rest of the celebrations dictated on the chinese lunar calendar. So christmas has never really been big for me. I do however feel for people like Alv whose mum likes taking holidays in December and always leaving him to fend for himself. So we started a tradition last year where we would host a christmas dinner or lunch and invite friends of ours in similar circumstances to celebrate christmas with us. After all, friends are family too. :)

So off we went to Deb's parents (which I am embarrassed to say that I don't know their names) for a bbq christmas lunch and a game of cranium to complete the afternoon; then back home in time to start cooking for our own little christmas dinner. (Thank you Mr & Mrs K for graciously having us over for lunch and Deb, Jerome, David, Rachel, Nathan and Jo for the fun we had with cranium.)


Christmas Dinner - 25.12.2006
Entree:
Seafood Stew w/ Garlic Croutons

Mains:
Roasted Turkey Breast w/ apple, macadamia and cranberry stuffings

Roasted baby potatoes
Honeyed carrots
Broccolini
Garlic mushroom
Cranberry Gravy

Dessert:
Bittersweet chocolate tart w/ mixed berries
Pistachio-nut brittle, Chocolate biscotti and Almond Bread


Christmas Dinner
The dinner table

Decorations were a bit poor in comparison to what I whipped up for christmas lunch the weekend before. No one to blame but me... though I did think that the napkin colours more than made up for my lack of decorative effort.

Seafood Stew
Entree: Seafood Stew

Having lived in Australia for the last 10 years, I am convinced now that no Aussie Christmas is complete without any form of seafood on the menu. For peace of mind sake, I whipped up one of my usual favourites, Bill Granger's Seafood Stew. This time with only prawns and 'a mussel' each. I wasn't trying to be stingy or anything, it was just that 2/3 of the batch of mussels I purchased for this dish died enroute to the pot. :(

I had bought some mussels for this dish on christmas eve from Prahran market. They were a real bargain and I was extremely happy to have scored 500g worth of it for less than AUD$5. Little did I realise that the good people at the fish shop had already de-bearded and cleaned them for me. Doh! When I took them out of the fridge for cleaning more than half of the mussels were already cranked open and had to be thrown out. Out of luck, I was left with 7 mussels, one for each person joining us for dinner that night. I suppose I should really call it, prawn stew.. since it's largely made up of prawns with the mussels as decoration.


Baked potatoes and Roast turkey breast
Main: Turkey breast roll stuffed with apple, macadamia
and cranberry stuffings w/ roasted baby potatoes

Another thing that I was convinced we must have this year is turkey. It only made sense since I had already made roast lamb for an early christmas lunch the weekend before. I had to convince Alv that we should have turkey instead of roast beef since we had roast beef for christmas in 2005. For this, I have my friend Hoi to thank for convincing a.k.a bullying Alv into the turkey idea.

The turkey was purchased from Kevin's Fresh Poultry at Prahran Market. If you ever go to Prahran Market and you are in need of some chicken (or assistance re: poultry), I cannot highly recommend any other chicken shop than Kevin's. They're the most helpful and friendly people in the chicken business I have ever come across! The lady who served me was most helpful when I told her that I had never made turkey before and was unsure of which type (whole turkey or breast) and how much turkey I had needed for dinner.

We went through the usual questions of numbers attending and whether I was game enough to stuff my own turkey or would I prefer to buy the pre-stuffed turkey breast rolls. I chose the latter and when we found out that they had sold out of the turkey breast rolls for the day, she went.. "no worries darl, come back in 5" and got one of the other guys to make up a turkey roll for me. Now that is customer service!


Christmas Turkey Breast stuffed with apple, macadamia and cranberry stuffings.
A peek at the stuffing

2kg turkey breast, roasted at 180 deg C for 1 1/2 hrs, I think. It's been a while now, in any case, if in doubt, just ask your butcher/local chicken shop how long too cook it.

I pre-marinaded the turkey with a mixture of thyme, garlic, salt, pepper and extra virgin olive oil; rubbed it all over the turkey and left it in the fridge over night. It was served up with some roasted baby potatoes that I roasted with rosemary this time round. The thyme gave the turkey a nice fragrant and the stuffing was delicious, a hint of apple, macadamia and the chewy cranberry raisins mm.. I usually pass on stuffings of any kind, but I ate up all of mine that day. All in all, a perfect turkey for christmas.


Honey Carrots side
Sides: 1. Honey carrots

For sides, we had some dutch baby carrots with butter and honey. This was courtesy of Clare - Alv's cousin.

Melt some butter and honey in the saucepan and cook the carrots in them until they're tender and serve.

Deliciously sweet and rich (because of the butter). Actually, it kind of reminded me of honey joys.. in a good sort of way of course.

Garlic Mushrooms side
Sides: 2. Garlic Mushrooms

Some mushrooms, cooked with butter, garlic, salt and pepper and parsley.


Broccolini side
Sides: 3. Broccolini

And some broccolini tossed with garlic, olive oil and seasoned with salt and pepper.


Cranberry Gravy
Cranberry Gravy

This cranberry gravy sauce was another recipe that I found in the Celebrate Issue (Issue 30) of Donna Hay Magazine. (Can you see a theme going on here...??) I had a little bit of trouble here as the recipe asked for at least 1/4 cup of pan juices from the roast turkey. Well my turkey didn't even have 1/4 cup of pan juices to it, so I had to made do with increasing the chicken stock and cranberry juice amount. I also added some cranberry raisins to it for a change.

Here's the original recipe:

Cranberry Gravy
*Issue 30, Donna Hay Magazine

1/4 cup pan juices from roast turkey*
2 tsp plain flour
1/2 cup cranberry juice
1/4 cup chicken stock

In the same baking dish where the turkey was roasted, pour in the reserved pan juices and flour, stir over medium heat for 2-3mins until the flour is golden. Pour cranberry juice and stock into a heat proof jug and add in the pan juice/flour mixture and gradually whisk the mixture into the baking dish until smooth. Serve gravy in a jug or gravy boat.

Makes 1 cup of gravy.


Wii Tennis

After dinner, more of our friends came over and we had a ball with the Nintendo Wii. Though I strongly suspect that a lot of them came over just for dessert. LOL.


Bittersweet Chocolate Tart w/ Mixed Berries and pistachio praline
Dessert: Bittersweet Chocolate Tart w/ mixed berries

I bought some lovely dark cooking chocolate from Monseiur Truffe for this special occasion. They were a block of Felchin Madagascar 64%, Finest Swiss Dark Chocolate. The recipe I chose for this occasion was a Simple Chocolate Tart from Jamie Oliver's the Naked Chef book. It's one that I have made before and I highly recommend it if you're up for an easy but deliciously simple but special chocolate tart. I can honestly say, I decided on the dessert for this occasion wayyyy before I worked out what to cook for christmas.

Jamie's sweet pastry recipe is my favourite tart base recipe. It's deliciously light and crisp. Regretably, I did not use his recipe this time round. :(

I was a bit lazy and had some left over pate sucree from the almond tart I made for christmas lunch the weekend before. But I highly recommend trying it for yourself.

Simple Chocolate Tart
*From Jamie Oliver's the Naked Chef

1 tart shell, baked blind. (Jamie's sweet pastry)
315ml double cream
2 level tbsp caster sugar
the smallest pinch of salt
115g butter, softened
455g best-quality cooking chocolate
100ml milk
cocoa powder for dusting

In a saucepan, bring to boil - double cream, sugar and the small pinch of salt. As soon as the mixture has boiled, remove from heat and add the butter and chocolate.

Stir until chocolate and butter are well mixed and completely melted. At this point, allow the mixture to cool slightly and stir in the cold milk until the mixture is smooth and shiny*.

*If the filling looks like it has split, allow it to cool down further and whisk in some extra cold milk until smooth.

Pour mixture into the cooked tart and cooled tart shell. Shake the tart to even out the mixture and allow to cool for 1 - 2hrs until room temperature.

Dust with cocoa powder and serve.

Jamie says that ultimately the tart should be short and crisp and the filling should be smooth and should cut like butter.
And it does:

Bittersweet Chocolate Tart

Look at that! Smooth and cuts like butter! I love this tart, it's easily the best chocolate tart I have ever tasted. It's rich, smooth and creamy, I served it up with a dollop of mascarpone cheese, some mixed berries (blackberry, red currants and strawberries) that was mixed with a couple of tablespoons of caster sugar and also sprinkled some pistachio praline onto top of the cocoa powder. Though, no one really noticed nor querried what it was. Sigh..


snack plate
Front to back: Pistachio brittle, Chocolate biscotti w/ pistachios
and sour cherries and Almond bread.


In addition to dessert, I had a platter of my christmas baking goodies out for snacks.

All in all a very Donna Hay christmas and a fabulous christmas with friends and family.

Monday, January 01, 2007

2006 in review

June

mosaic june

My first venture into food blogging, after salivating over the many food blogs out there occured on a Friday night when I was at home and bored silly. The first food related post was about the Matcha sponge cake Hoi and I made at her place, our attempt at immitating the Matcha Opera Cake made by Keiko (Nordljus) and Hoi's Baked Lemon Slice.

It was then followed by some Jaffa Crepes we made at Queenie's house following the lovely dinner made by Mrs Chan for us.

Third was a quick soba dinner idea for Ali and Ange and we closed off the month of June with a big dinner 'when the cat's away, the mice comes out to play' dinner at FLim's when his parents and Alv's Mum went on another overseas escapade.
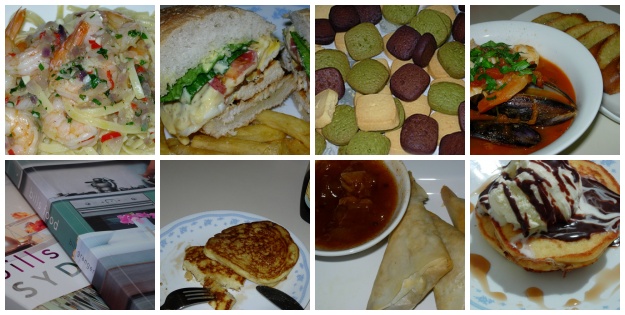
July

mosaic july

July became a very 'Bill' month almost 3/4 of the posts were reincarnations of Bill Granger recipes. We kicked off July with some Garlic Prawns w/ Linguine that I adapted from Bill Granger's Garlic Prawn recipe in Bill's Food. Then disaster followed as I misread Cayenne Pepper for Cajun and emptied the bottle onto some chicken tenderloins that was to be my favourite Caesar salad. After that disaster, I dug into some home made club sandwich and pondered where I could find the best club sandwich in Melbourne.

A saturday afternoon saw me playing with Matcha and Chocolate again as I made some matcha and chocolate butter cookies. The following 
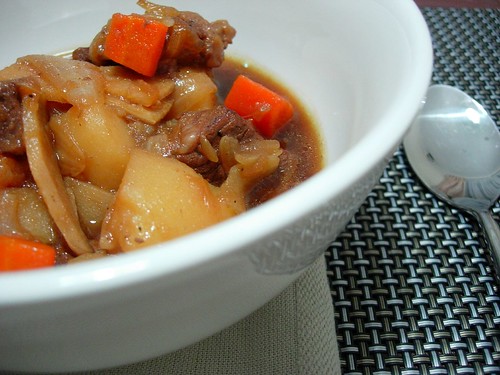
monday, my housemate was out for dinner (she's not a big prawn eater - unless you count lobster as a prawn) so I was able to try out Bill's Seafood stew.. a tomato stew with loads of prawns, mussels and scallops in it and a taste of Bill's famous Ricotta hotcakes. Then a 
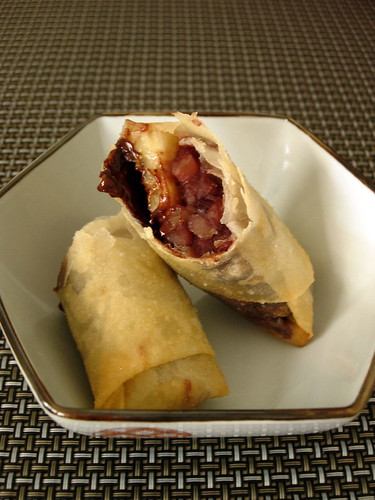
follow up of Bill's Ricotta Hotcakes with some left over batter, Vanilla ice cream and Jeanne's chocolate sauce.. (mmmm.. heavenly dessert..) and a moroccan filo parcel appetiser to round up July.

August

mosaic august

Incidentally, I participated in my first blogging event in August. Up til then, I had been salivating over other bloggers Took me two months to work out the courage to do so but it wasn't too bad of an experience. Eomeote #17 was hard headline to come up with.

Friend Wendy left us for NY in August, and as a farewell we had a small dinner party for 3 at Alv's when he went skiing in Hotham. Dinner for Wendy was a bit of a challenge for me as I had never cooked for a vegetarian before, especially not one as strict as W. But all was good, I made it up with dessert.

That was followed by a small blog 
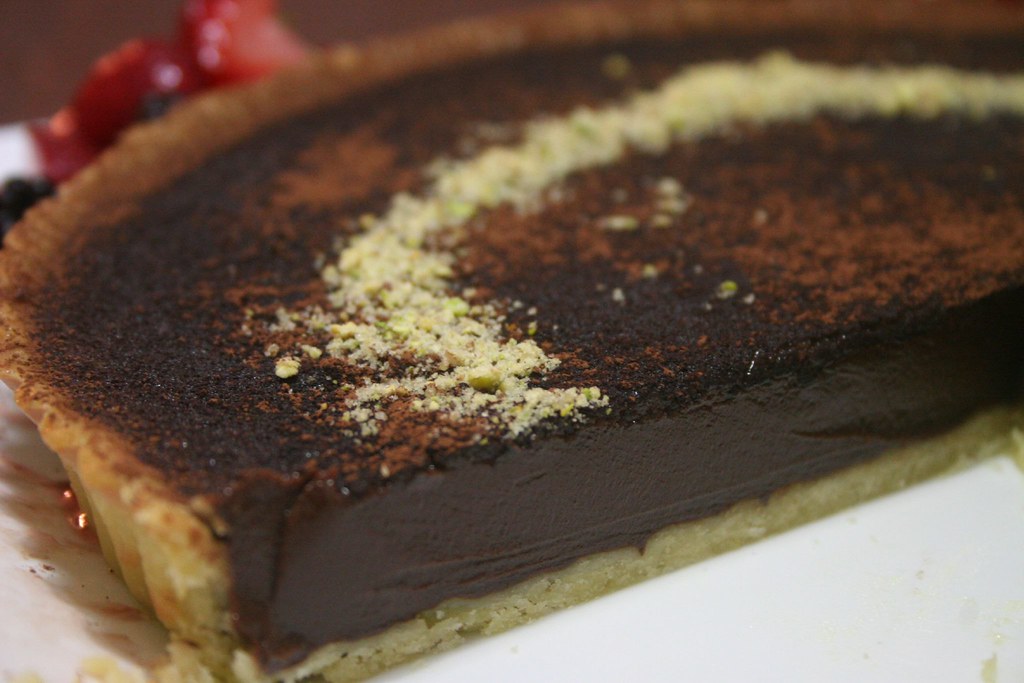
makeover and a semi lemon tart disaster that started a long list of terrible meals that ensued. A quick visit to a new organic store in the nearby shopping centre saw me leaving with some lovely spices to experiment with whilst the boy goes off on another skiing escapade.

We had an earlish spring this year, everything in the front and backyard bloomed in late August. I woke up early one Sunday morning and went out to the yard with my little Nikon and snapped to my little hearts content. (blistfully unaware that my housemate snuck a little giant guess in the house the night before LOL)

Breakfast out in trendy Elwood on a nice sunny sunday rounded up the posts for August.
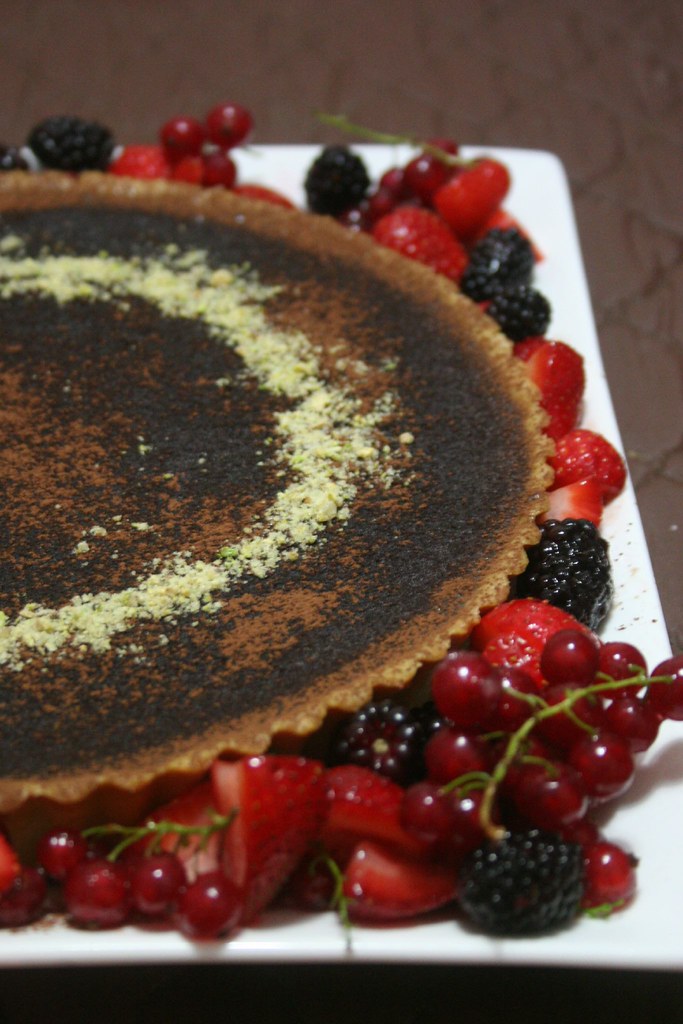
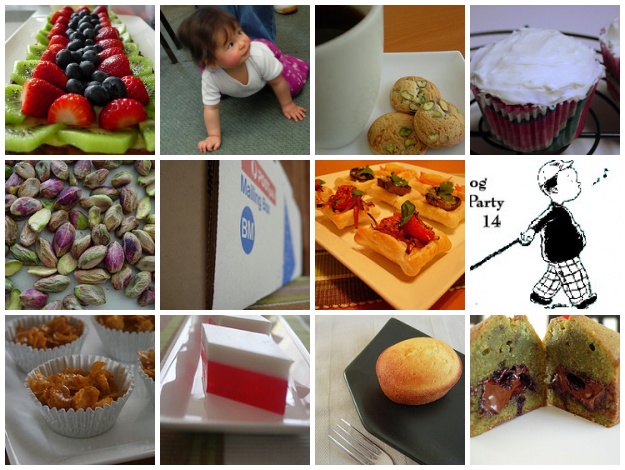

September

mosaic sept

Come September, Little Bethany turned a big '1' year old and we had a big bash with loads of yummy food from Great Gran's cherry slices, Aunty Rachel little cupcakes (and cupcake birthday cake) and a fruit tart (from me) and lots of cool pressies.

September was the month I went pistachio "nuts" with pistachio cookies and pistachio cupcakes galore and I came out of my little shell, went all out and participated in 4 food blogging events! Blogging by Mail 2, Hey Hey it's Donna Day 5, Blog Party 14 and Sugar High Friday 23.

Must've been the nuts. ;)

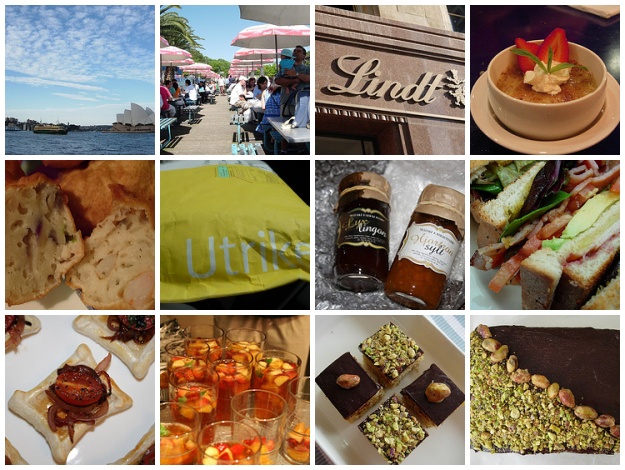
Towards the end of September we took a short weekend trip to Sydney and friend Ali came back from London for her brother's wedding. With the holiday and her return, that last week of september saw us doing so much together that I didn't get around to posting them until october came around.

October

mosaic9882892

Started off october with another entry to HHDD and a lovely package from Clivia of Clivia's Cuisine via BBM2. I got a taste of Sweden in the lingonberry and cloudberry jams and swedish candy that she sent me as well as a very informative book on stockholm and some dala horse sourviettes.

October was also the month of the impending wedding of my dear friend Mel. With loads of wedding related activities such as hen's weekend at Ocean Grove and Kitchen Tea, I only managed to sneak in a bit of cooking at the Hen's weekend, a bit of petit fours for SHF24 and a cake for my mum's birthday before the wedding. (plus a gastro bug a week before the wedding)
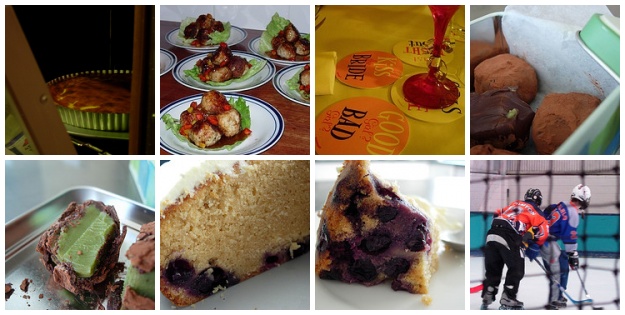

November

mosaic nov

Mel's wedding was the most perfect wedding day I have ever experienced/attended. With that well and truly over and Mel lapping up the sun in Vanuatu, I finally found the time for a bit of rest before the crazy end of the year christmas rush began at work. I spent some time playing with chocolate and came up with some 
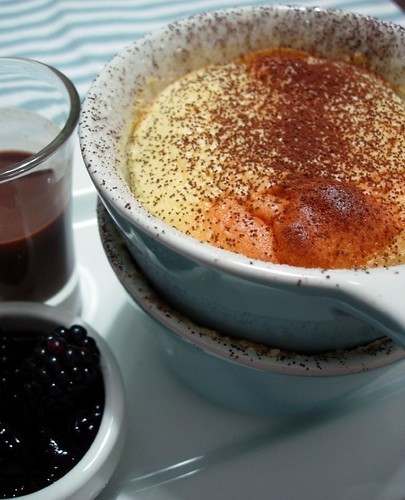
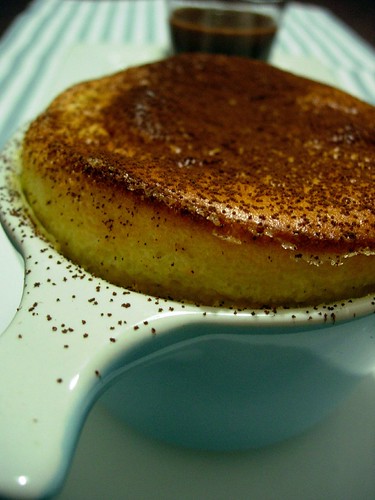
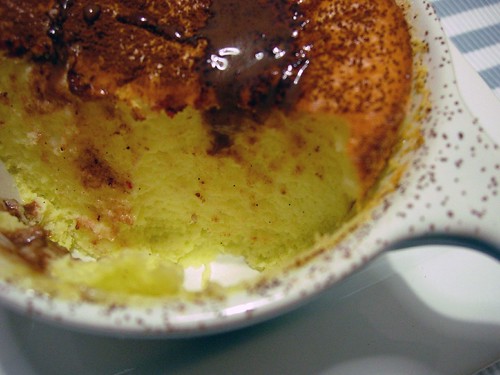
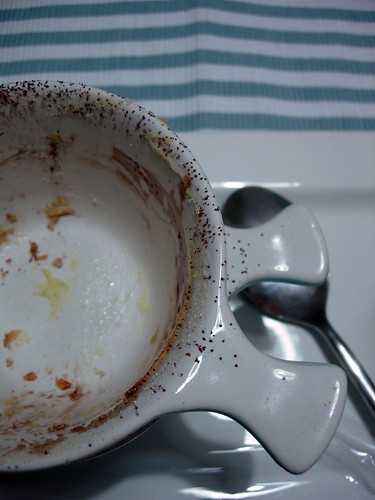
Matcha truffles for SHF25, cooked up a farewell dinner at my rental place (I left the rent paying world and moved into the free-loader world) and experienced another oven semi-disaster.

After that, being the good girl friend that I am *wink*, I whipped up some raspberry semi-freddo and a black forest cheesecake for Alv's birthday.

I also managed to make a blueberry vanilla cake with cream cheese frosting that is still parked in my draft folder. It was a little tea cake that I whipped up for a lunch at friend Bec's house before we scooted off to watch her partner kick some butt at inline hockey.
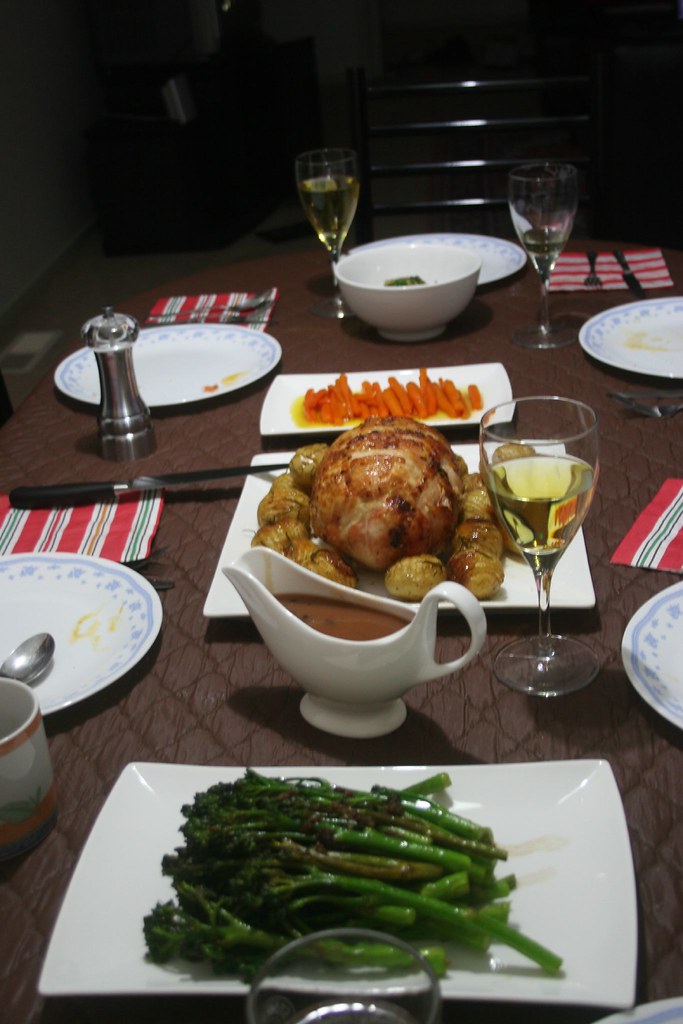
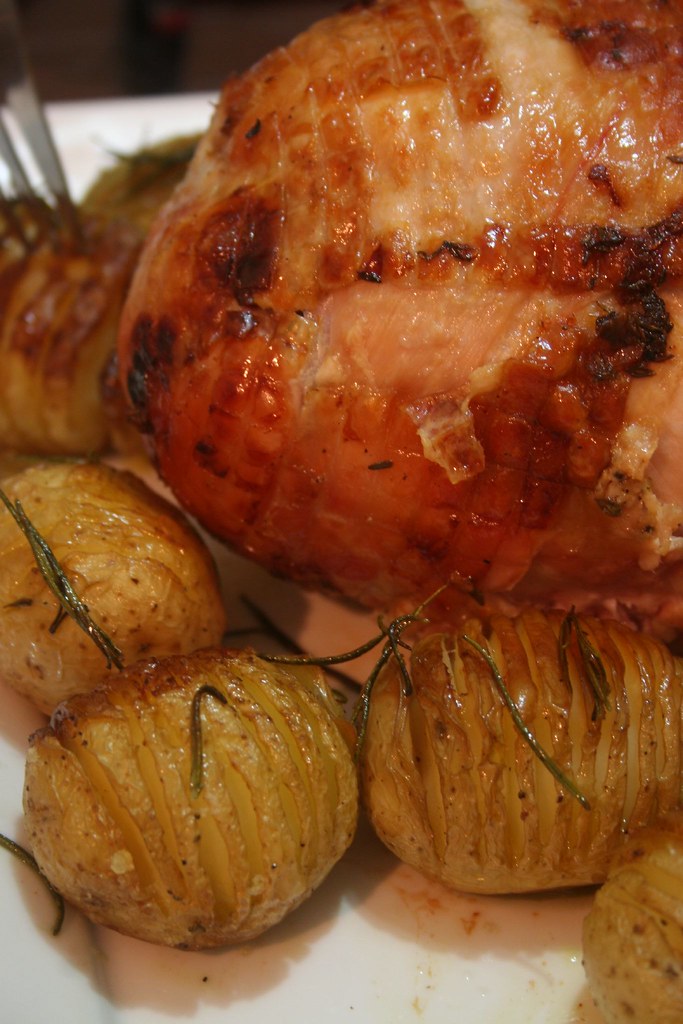
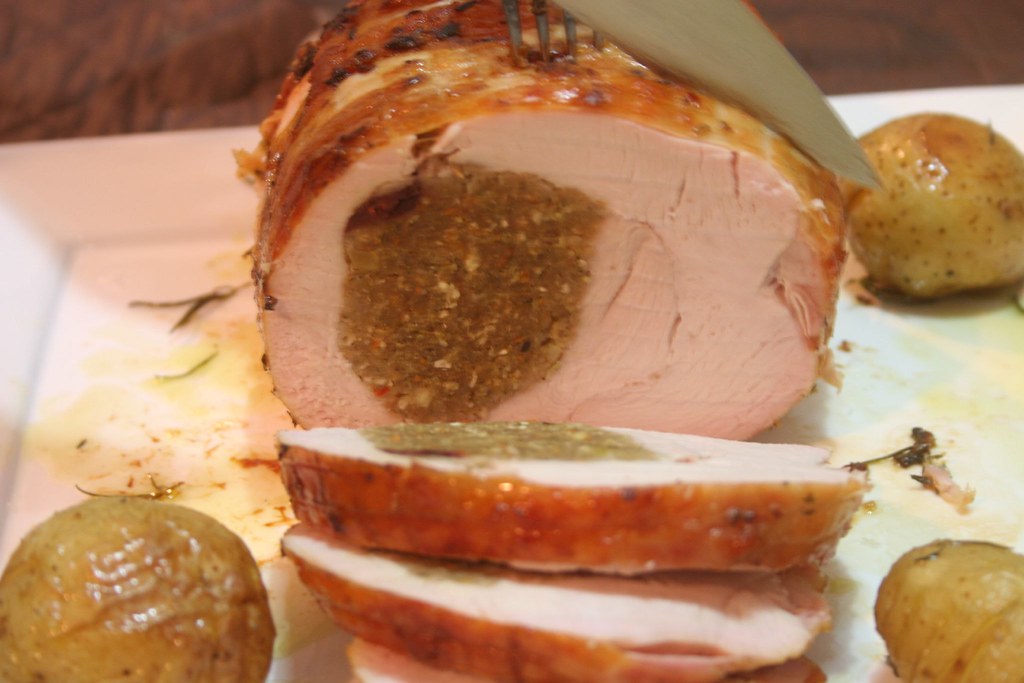
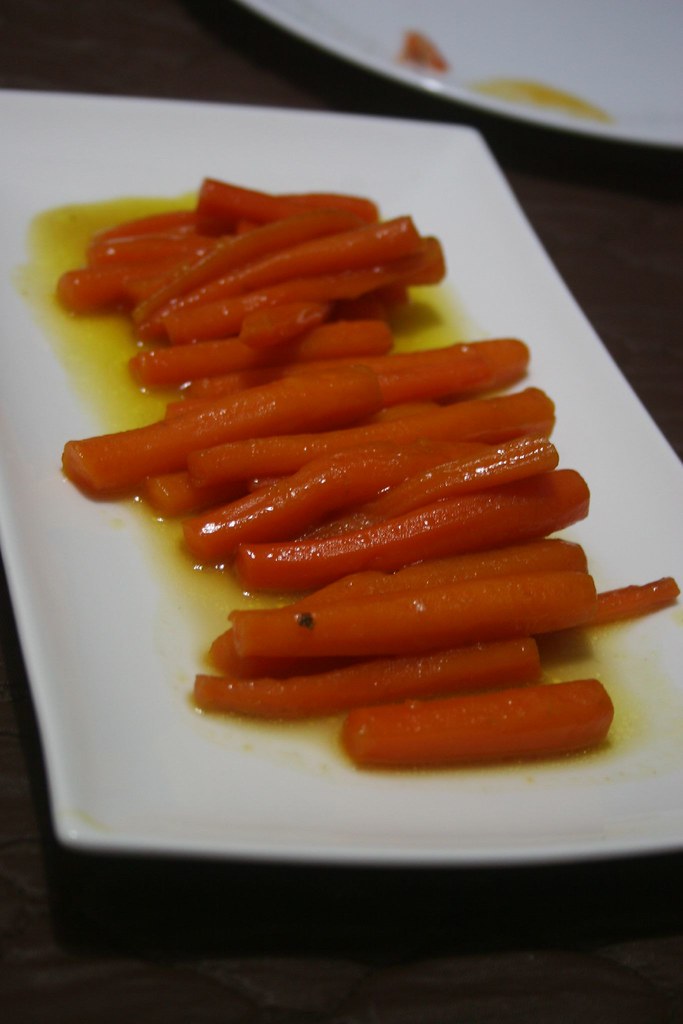
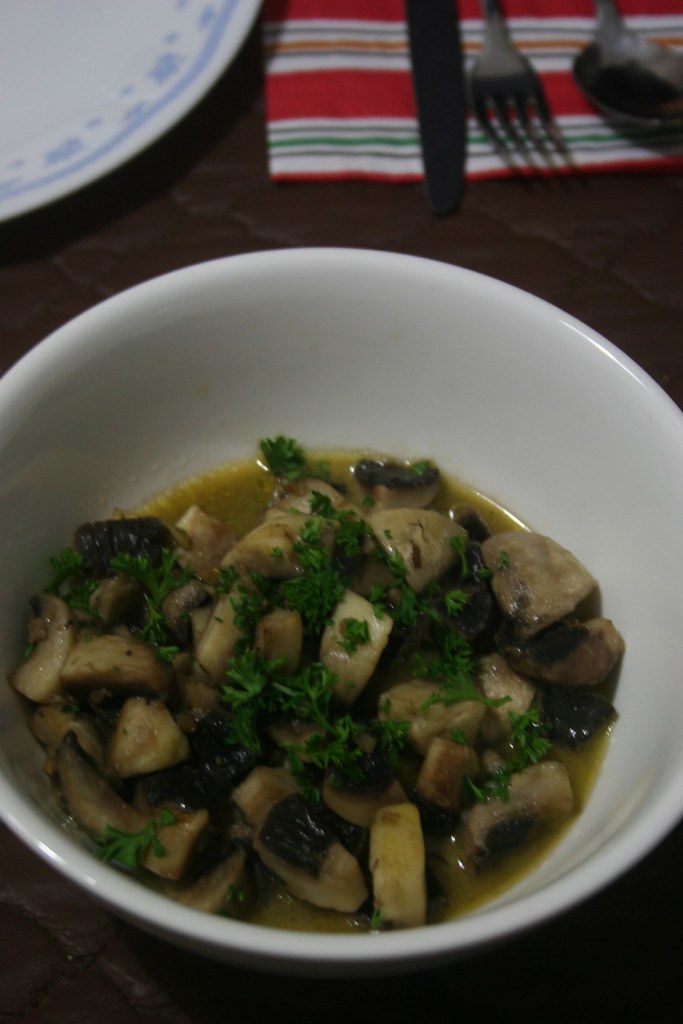
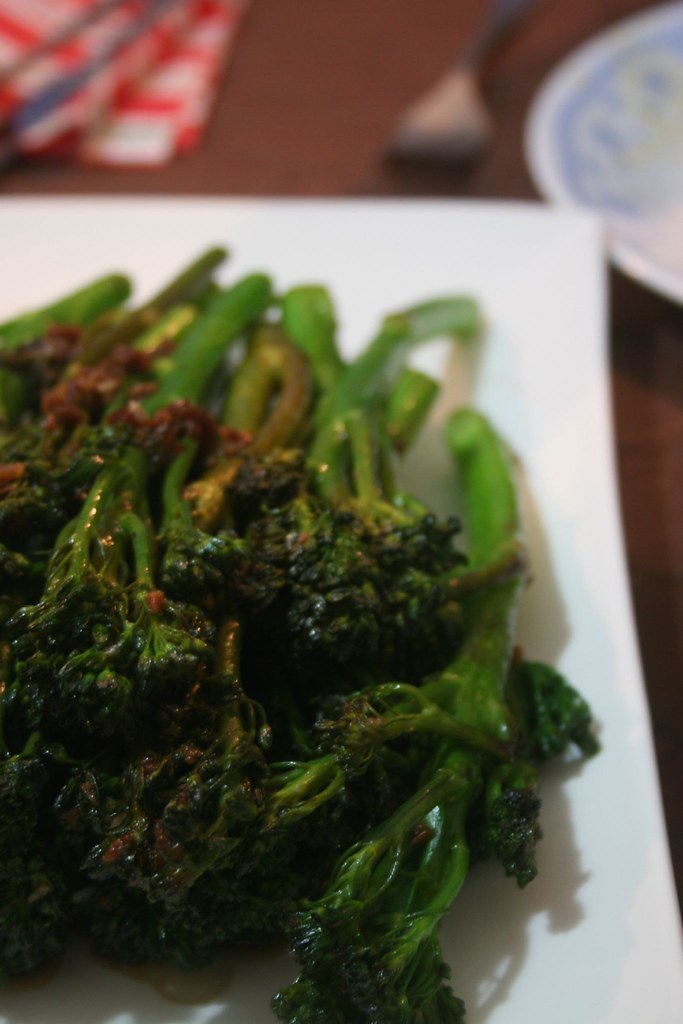
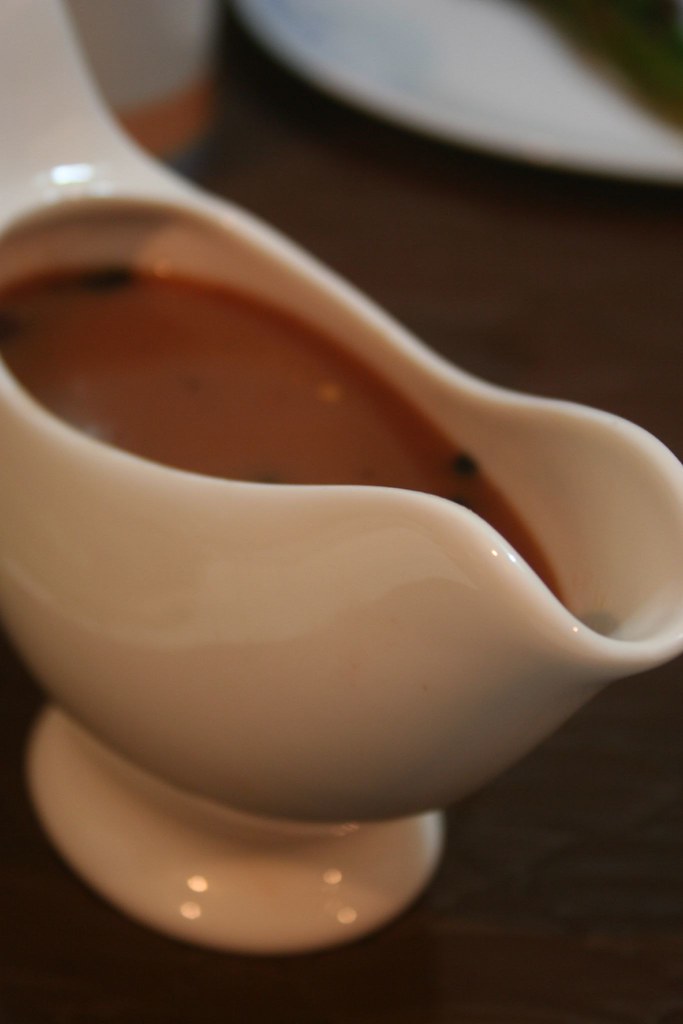
December

mosaic dec

Christmas rush at work began, and I barely had time to do any christmas baking until the last weekend before work finished. Cooked up a christmas lunch for the family-to-be (when the time comes) and baked some pistachio cookies that was going in as part of my christmas gift package this year.

Also whipped up some 
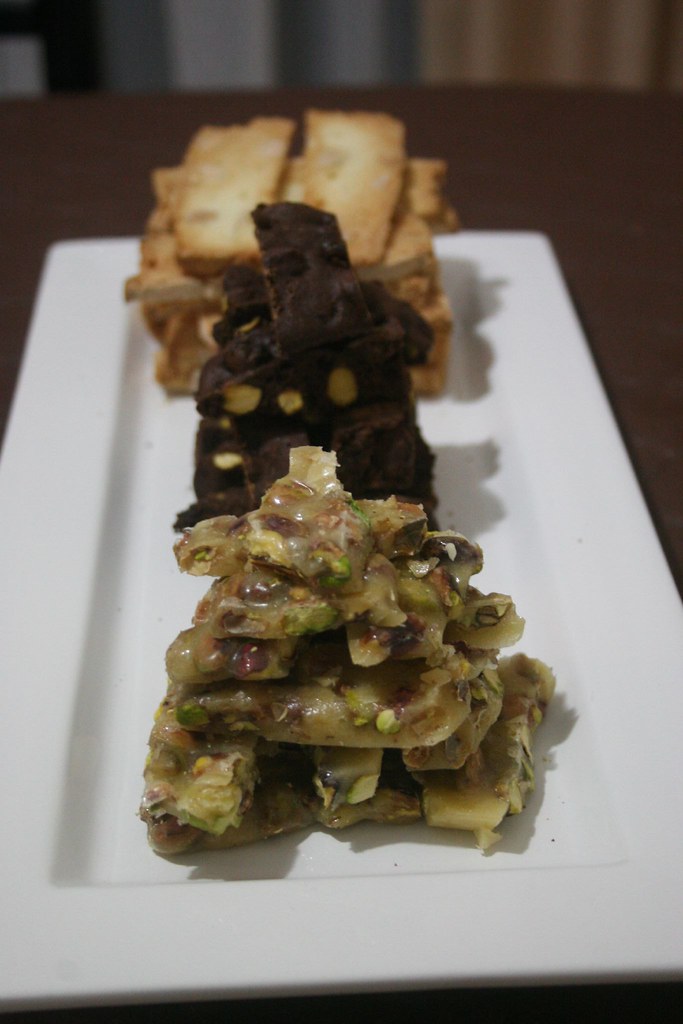
Lime and Honey chocolate truffles that weekend and when I finished work on Dec 20, 
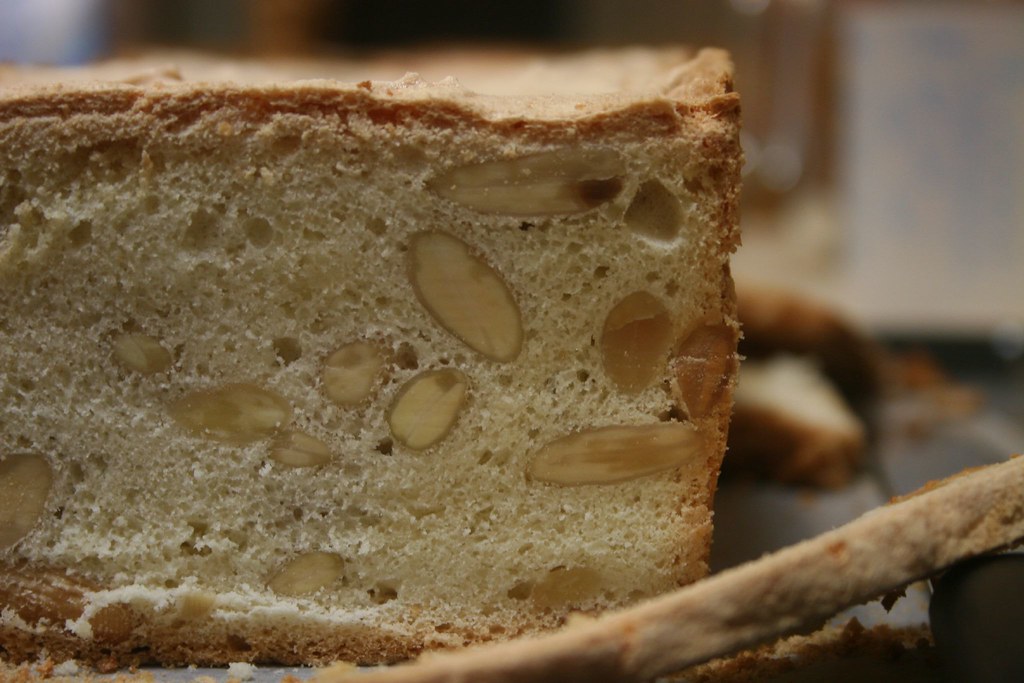
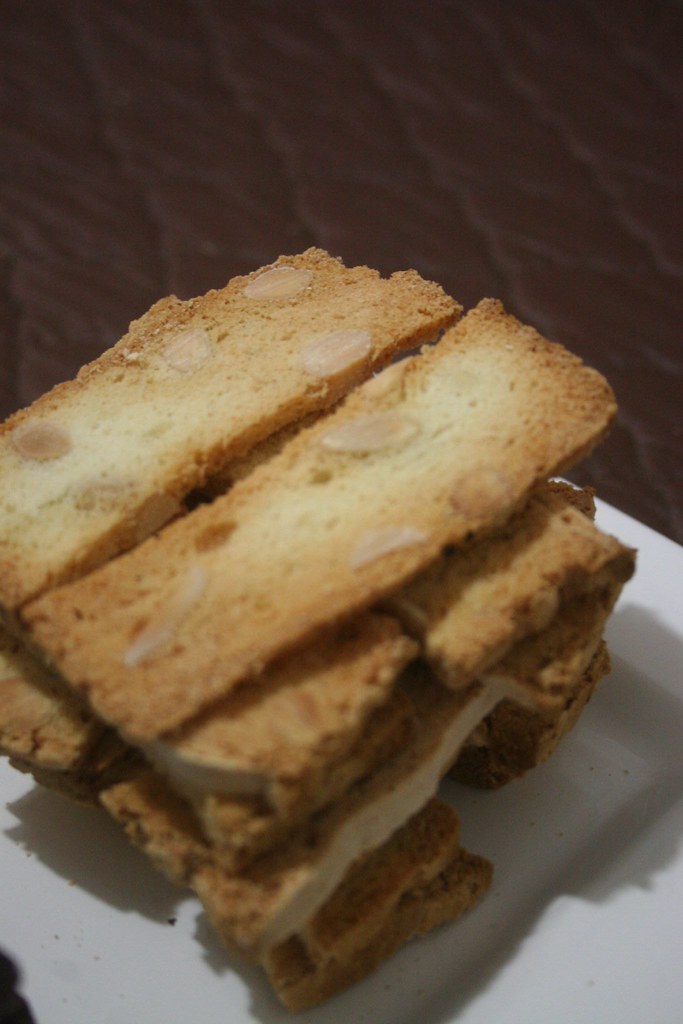
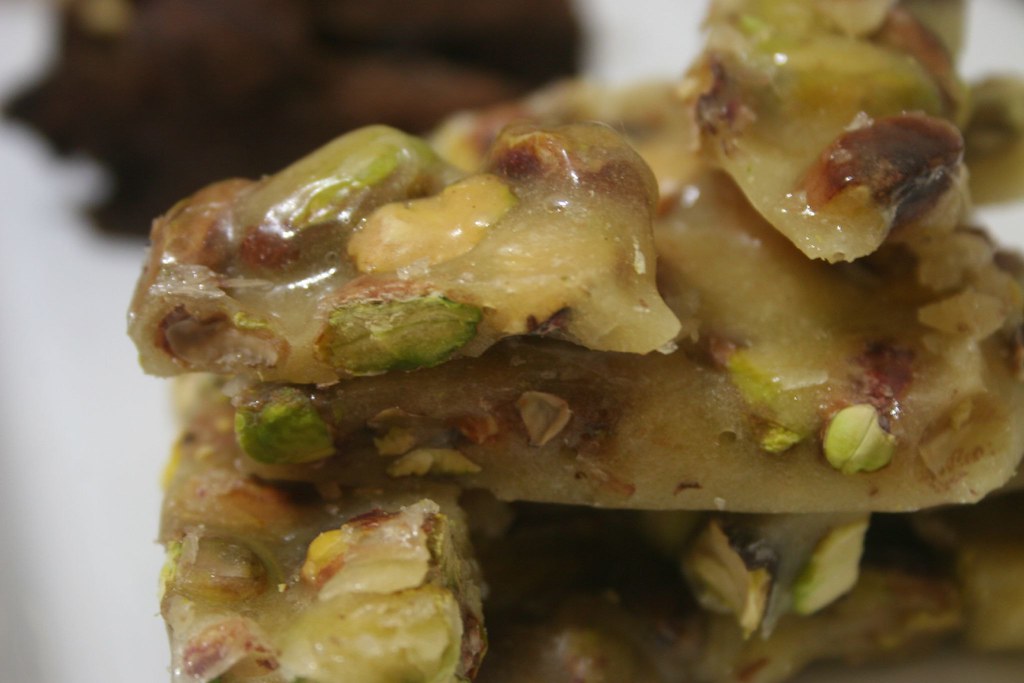
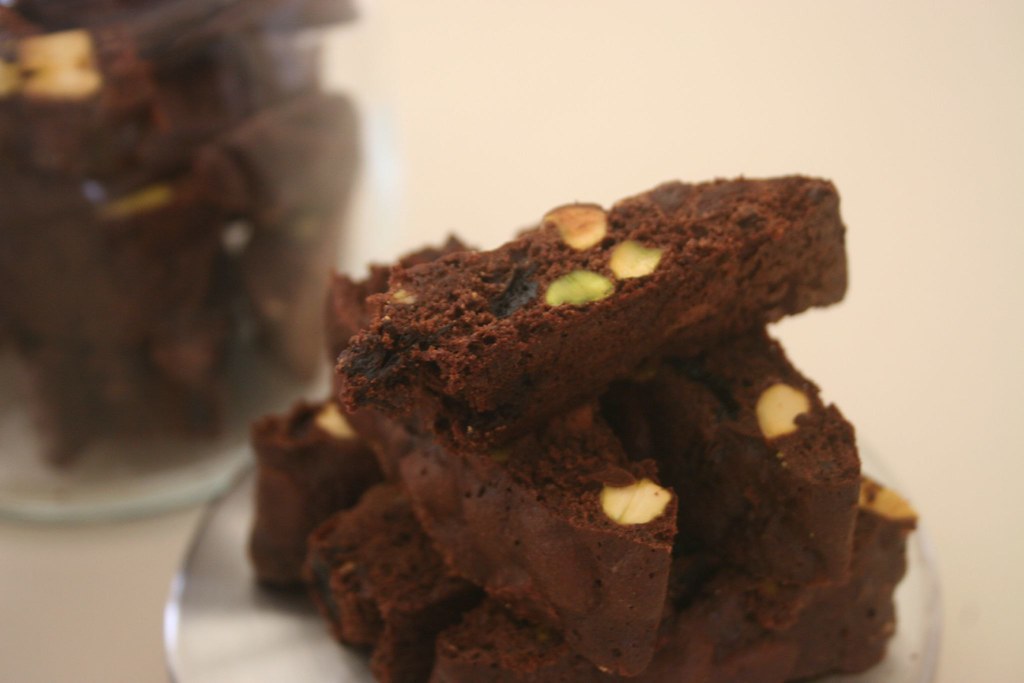
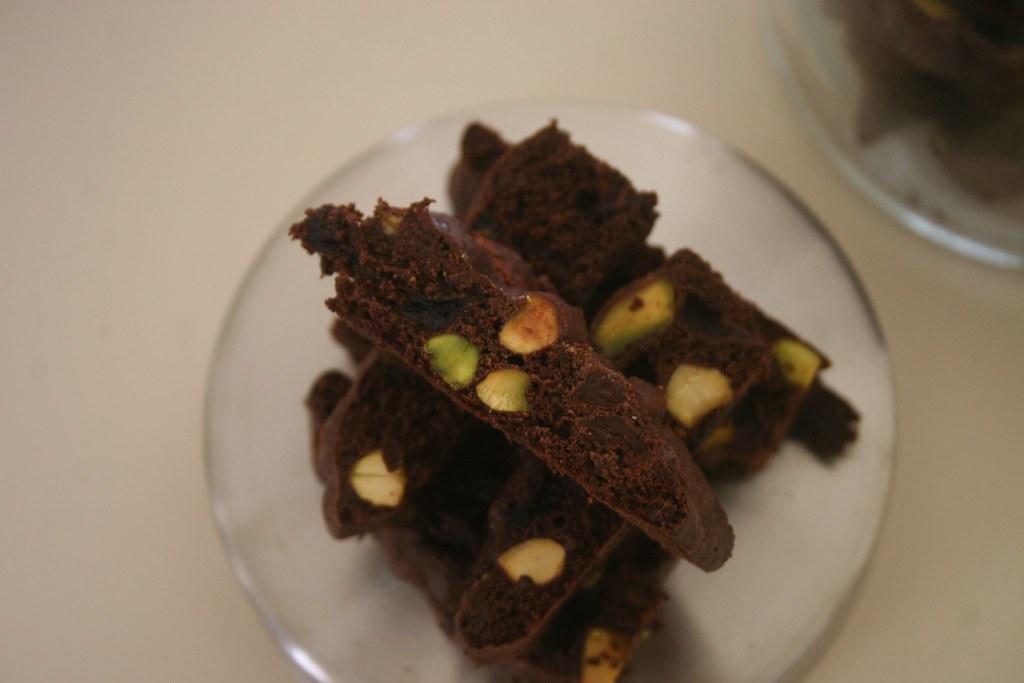
whipped up some almond bread, chocolate pistachio biscottis and tried my hand at making pistachio brittles.

Alv's mum jetted off to Singapore and left us to fend for ourselves again on christmas day. Fend for ourselves we did as a few our friends joined us for christmas dinner and the rest all rocked up for dessert.

December also saw Menu for Hope 3 raising an amazing US$60,000 in donations for the UN World Food Program.

Last but not least, who can forget New Year's Eve? LOL It's a quiet one this year, a small bbq and the companionship of a Nintendo Wii was how we spent ours.

Hope yours was more exciting than that :)

Happy New Year!

May 2007 be a year full of promises, good fortunes and good food for all of us!

Ed: hmm.. just realised I messed up the photos a bit. November and December related ones especially.

Christmas Baking - Part 2

Almond Bread Loaf

In the time that I had between finishing work for the year and christmas, I manage to do a bit more baking. My colleague Julie has been trying to get me to try this Almond Bread recipe of hers for months now. Ever since we had a conversation of almond bread vs biscotti.

I have to admit that it's a pretty simple and fool proof recipe. Although, if you're me, you'd probably stuff it up by not reading the 'entire' recipe properly! Somehow, I manage to overlook the most important aspect of this recipe which was that 'a non-fan forced oven' should be used for this recipe. Would you believe I even drew stars and marked a big square over the temperature note to highlight the point and still missed it?! Sigh..

Another reason I took so long before attempting this recipe was because my old oven at the rental place did not come with an option to turn off the fan force functionality.

Anyway, I have no way of knowing whether I manage to get the right texture for this almond bread since I forgot to turn off the fan force feature. But suffice to say that it was nice and crispy on the outside and soft on the inside and wasn't too sweet. Which I think almond bread is meant to taste like.. at least from what I remembered of the ones I purchased anyway. I also recalled that they were a bit crispier, so I sliced up the bread, halved them in size and baked it in the oven at about 100 deg C for about 8mins on each side, so they ended up being a bit crispy and browned.

almond bread


Jules's Almond Bread

6 egg whites
1 pinch of cream of tartar
230g caster sugar
200g plain flour, sifted
230g unblanched almonds

Preheat oven (non fan forced) at 170 deg C. Beat eggs and cream of tartar until soft peaks. Slowly add in sugar and beat until firm peaks and mixture becomes glossy. Fold in sifted flour and almonds. (Do not over beat) Pour into a greased and floured tin and bake for 40mins.

Remove bread from tin, let it cool, wrap it up in foil and store away in a cool, dry place for about 1 week or 2 (I'm not sure why, I think it's to do with drying it so that it's easier to slice) before slicing it up and rebaking the slices in the oven for 10 mins at 100 deg C.

Ed: Today (2.1.07) I showed Jules and she told me that I had potential. My bread was well formed and it looked like the way it's suppose to be. Although she neglected to mention that I was suppose to wrap it up in foil and store for about 1 week before slicing it up and putting it back in the oven for 10mins to crispen it up a bit. So I kinda got the right idea.

<>

After reading Ellie's peanut brittle post, I was dying for some brittle! I searched high and low at all the supermarkets and speciality stores at the nearby shopping centre but couldn't for the life of me find a place that sold light corn syrup. Arghh.. it was so frustrating! Reading Ellie's post had reminded me of the pistachio brittle from The Last Course and not being able to find the key ingredient drove me absolutely nuts. Fortunately Ellie was kind enough to tell me the name of the store she found that sold light corn syrup. Though by the time I got around to purchasing it, my crazy craving had almost disappeared. (Funny what work does to you!)

I have to say making brittle of any sorts is hard work! I don't know how you did it Ellie, but you sure did it well. I made two batches of these brittle and sweated heaps over the step where I had to spread it onto the baking tray. It took massive amounts of effort to spread the mixture evenly and half way through the process the sugar started to harden and struggle against my every efforts to spread it through the baking sheet. It became so stubborn, lumpy and uneven that I almost gave up on it. Breaking them to pieces when they were done though was a piece of cake (and mess with brittle flying everywhere!)... lol. Nevertheless, these babies are delicious. Caramelly, sugary and sweet pistachios..mmm I have enough to last me through another two cravings attack :D

Pistachio brittle


Pistachio-nut Brittle
*From Claudia Fleming's The Last Course. p142
*Please note: The Last Course ingredients are written in imperial measurements form, so my conversions may not be entirely accurate

1 + 1/2 cup shelled pistachio nuts
1 + 1/3 cup of sugar
1/2 cup water
1/4 cup light corn syrup
2 + 1/2 tbsp unsalted butter
1/4 tsp + 1/8 tsp baking soda
1/4 tsp salt

Preheat oven to approx 177 deg C (350 F). Spread nuts out in one layer on a baking sheet and bake them for about 10mins until golden brown. Remove from oven and cool

Butter a baking sheet or line it with a non stick liner. Grease a spatula and set aside.

In a large, heavy saucepan, combine sugar, water, corn syrup and butter. Cook over medium heat, stirring at first to dissolve the sugar and then leave until mixture is light caramel colour. This should take about 12mins or if you have a candy thermometer, when the temperature reaches 160 deg C. Remove saucepan from heat and whisk in baking soda, salt and nuts.

Work very quickly and spread the mixture with the buttered spatula onto the baking sheet. Be extra careful as the mixture will be very hot. Let brittle cool completely and break it into pieces.

Notes:
A candy thermometer would really help but is not essential.

Ellie has a good tip for the 'spreading' step on her blog. She recommends heating up a silicon baking mat in the oven and spreading the mixture over it. I didn't have a baking tray that was big enough to fit my silicon mat, nor was I willing to cut up my silicon mat for this purpose. But it's something I would probably try next time when I find a smaller silicon baking mat.


<>


Chocolate cherry pistachio biscotti

Last but not least, is another of my Claudia Fleming favourites, Chocolate Biscotti with Pistachios and Sour Cherries. I had intended to make a small batch of these as Christmas nibbles, but was only left with half when I was done because Alv's Mum's friends ate about 1/4 of it whilst they were here playing mahjong and his Mum took another 1/2 home for her friend in Singapore.

Humph.. well I always knew they were popular but I didn't think that I would have to ration them over christmas!


Chocolate Biscotti w/ Pistachios and Sour Cherries
*From Claudia Fleming's The Last Course. p. 227
*Please note: The Last Course ingredients are written in imperial measurements form, so my conversions may not be entirely accurate

1 cup dried sour cherries
2 cup shelled pistachio nuts
1 + 3/4 cup all purpose flour
1 + 3/4 cup firmly packed dark brown sugar
1/2 cup granulated sugar
3/4 cup unsweetened dutch-processed cocoa powder
1 tsp salt
1/4 tsp baking soda
3 large eggs
4 tbsp unsalted butter, softened
1 + 1/4 tbsp coffee extract
1 + 1/2 tsp vanilla extract
220g (7 1/2 oz) extra-bittersweet chocolate, cut into chunks

Cover cherries in a saucepan with water and bring to a simmer over medium heat. Once the water is simmering, turn off the heat and let it cool. Drain the cherries and set aside.

Preheat oven to 165 deg C (325 deg F*) and toast the pistachio nuts in the oven until fragrant and lightly golden around the edges (may take about 5 - 7mins). Remove from oven and cool.

In an electric mixer (with a paddle attachment) mix flour, sugars, cocoa, salt and baking soda on low speed. Add eggs one at a time and mix well before adding the next egg. Then add butter and the extracts and mix well to combine. Finally stir in the pistachios, chocolate and cherries and let the dough rest for 5mins.

Wet hands and divide dough into two logs (or more) each approximately 5cm (2inches) in diameter. Place each log on a lined baking tray and bake for 30mins until firm. Remove from oven and let it cool.

Reduce oven temperature to 95 deg C (200 deg F). Using a serrated knife, slice each log into 1/4 inch thick slices. Arrange biscotti on lined baking tray and dry them in the oven until firm and crisp. This may take 1 hr to 1 1/2 hrs. Remove from oven and transfer onto wire rack to cool.

Makes about 5 dozen.


My biscotti ended up being fairly large, so I sliced them in halves so that they would fit into my containers.

These biscotti tastes absolutely deliciously chocolately. I love the combination of chocolate biscuit, chunks of chocolate, tart sour cherries and bits of pistachios littered thorough the biscotti. Make no mistake, this biscotti is rich and absolutely moreish. I just love how the tartness of the sour cherries would occasionally cut through the rich chocolate taste whilst the pistachios just gives it a nutty texture and flavour.

Chocolate cherry pistachio biscotti